In this “How-To Tutorial” I follow on from the basics of the Hair Rig seen in a previous tutorial I have done (that can be seen here) using a few additional components of end tackle from the PB Products range to show you in a step by step guide how I tie the, Blow Back Rig.
It is an Ideal rig for most situations and enables us to fish for carp using a number of different baits on the Hair. It is an especially tricky rig for carp to eject this is due to the way the rig is designed. With the bait/hair mounted onto the rig ring, the bait is ejected from the carps mouth, while the hook is left in-place more often than not resulting in hooking the fish.
To buy and try the end tackle and other items seen in this tutorial video, follow the links below that will take you over to Big Carp Tackle.
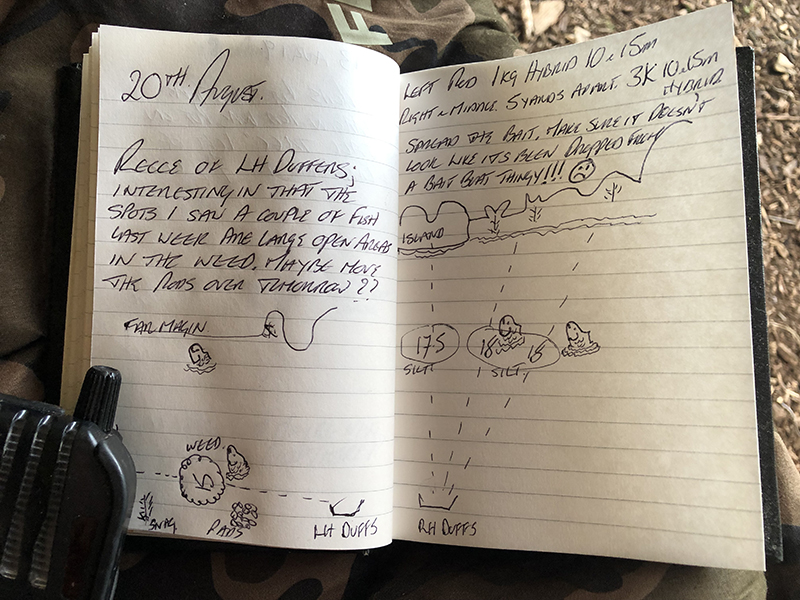
That’s right, everyones favorite navigation app can also be a valuable asset to the carp angler, and all anglers alike. According to Wikipedia, Google Maps is the fourth most popular app in the United States, and with good reason. It’s your trusty sidekick, your guide to the unknown, and if you end up lost, it’s your North Star. Something Google Maps isn’t necessarily designed to do, however, is to help us anglers find our next swim, and to assist us with gaining the knowledge needed to better access, and approach these new swims, which it very much does. Here are three simple ways you can better utilize Google Maps as an angler.
1. Find access points
So you’ve noticed a local body of water that screams carp, but there’s one small hurdle you’ll need to overcome. How do you get to the water? Public access points? What if there are none? Well, aside from searching for marked locations on the map like public boat launches, fishing access, and so on, you can use Google Maps satellite view to do some in-depth investigating, and find those precious, quiet, isolated swims we all love.
You’ll want to start by identifying the water you’re trying to explore. Scan the shoreline and look for unmarked access roads and pull-offs. You’ll likely be intrigued by your findings. I’ve fished a few local waters near me with unknown access points right under my nose. Some of which have produced some stunning fish since discovering.
Things like tire marks in the grass and worn out spots near the waters edge are dead giveaways that people fish that spot, and that it’s likely accessible.
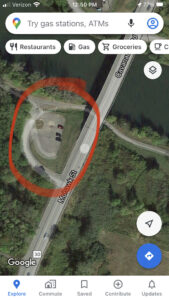
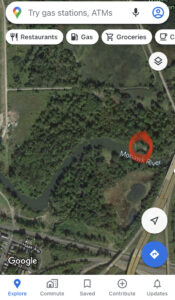
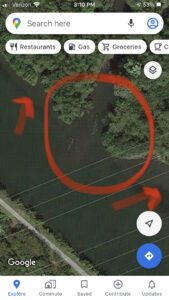
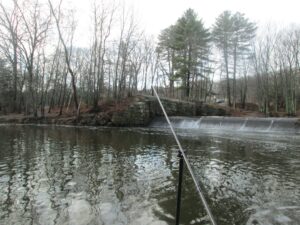
Here is a perfect example of a spot near me that took a while to find. It’s quite difficult to access and I haven’t fished here yet it but it certainly has potential. From the sky it’s hard to see much of anything..
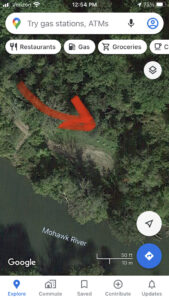
…but upon further inspection I noticed a spot that appeared to be a parking area with a few large rocks clearly placed intentionally. After scanning the map I found an unmarked access road leading in the direction of the parking area. Naturally, I dropped a ping on the map and made plans to attempt to visit this carpy looking swim at a later date, which brings me to my next tip.
2. Save pinged locations and take notes
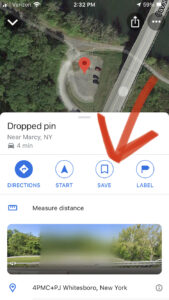
It’s important while you’re finding these new spots that you drop a ping and save the locations before moving on. Otherwise you may find yourself wasting time scanning the map again later and losing track of which one was where. The only thing you need is a Google account to access this feature. Simply tap the location you want to save to drop a ping and the above options become available.
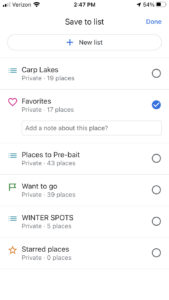
From here just click ‘save’ and you’ll be prompted to a menu asking which list you’d like to save your ping in. You can use an existing list such as “Favorites” or “Want to go”. Or simply create a new list titled however you feel appropriate. This will give you the option to leave some notes about the swim as well which really comes in handy before and after you’ve physically been there. Tip number three talks about one of the most critical variables to take note of when fishing any swim, structure.
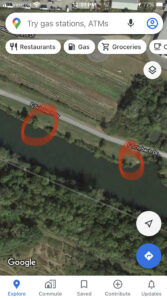
3. View structure you can’t see from shore
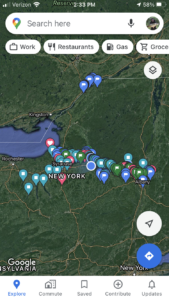
Incredibly, given the right circumstances, you can see an unbelievable amount of structure in the water using the satellite view on Google Maps. Structure such as fallen trees, weed beds, sand flats, changes in depth, inlets/outlets, the list goes on. This is wildly beneficial to us carp anglers because it can give us an idea of what we may be getting ourselves into before we even cast our first lead to feel out the bottom. Also, it can lead us to more remote swims such as ones only accessible by boat. You can spend hours mapping out places to visit in the future, and if you live in an area where winter forces you away from the bank for a few months, this is a great way pass the time and hype yourself up for what’s possible come spring. As you’ll see below, I’ve spent quite a bit of time mapping out swims across my entire home state of New York.
So while you’re trapped inside with cabin fever pull out your phone and get to searching! You never know what may be right around the corner teeming with massive carp waiting to be caught. But most importantly don’t forget to take action on those findings come spring and get out on the bank!
Boilies are too expensive to bait up with… That’s the most common thing I hear from anglers who stick to fishing maize or other particles. That can be true, most of us don’t have hundreds of dollars to spend on kilos of boilies to bait with. Using a hybrid approach to your baiting methods can get carp hooked on boilies a lot quicker and hopefully pick up larger fish.
I often get bored fishing the same venue over and over, so find myself travelling to other lakes and rivers both near and far. This doesn’t naturally help me with a boilie approach as baiting up and a bit of time is usually needed for the carp to gain an acceptance of boilies as a food source. What I needed was a way to speed this up, so that I could still fish boilies on new venues but also put bigger fish on the bank quickly as most of my fishing is day only trips with the very odd night mixed in. That’s where matching the pack comes into its own.
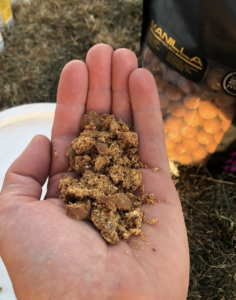
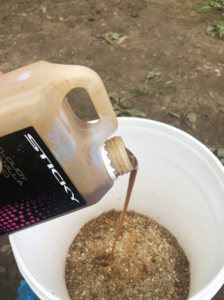
I will usually start off with spodding some mixed particles into my swim as a base to attract fish into the area, the amount tends to depend on how long I’m going to be fishing for. I think we all know how deadly pack bait can be. My pack bait starts off as a simple panko/oats base and I want to give mine a boost while also getting the fish familiar with the attractors within my hookbaits. Boilie crumb and pellet is a great way of doing this. I have seen time and time again carp work themselves into a frenzy over boilie crumb, this often results in quick hook ups on a boilie hook bait.
The smaller crumb releases my boilies attractors quickly while the bigger pieces give the carp something tangible to eat
I add a couple of handfuls to my pack, making sure to vary the size of the morsels. The smaller crumb releases my boilies attractors quickly while the bigger pieces give the carp something tangible to eat. All the time they are gaining confidence in my boilies without actually eating a whole one.
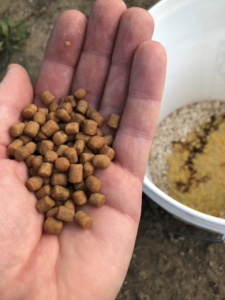
Another option is to add pellets. I use the 6mm Manilla pellets in my pack, again adding a handful or two. These are basically mini boilies that break down quickly, I’m affectively baiting larger amounts of boilies every cast without the cost. The other reason I like to add bigger pieces to my pack is you can often have a shoal of small shad feeding on your pack, these veracious feeders can clean up a panko pack or fine boilie crumb in minutes but having these larger pieces in there will mean having bait out there for longer.
I use the 6mm Manilla pellets in my pack, again adding a handful or two.
The finishing touch is to add some cloudy Manilla liquid. This again matches my hookbait and adds smells and attractors through the water layers, drawing fish in quicker. Catapulting a few 20mm Manilla freebies into the area will also get them confident when it comes to picking up your hookbait.
The finishing touch is to add some cloudy Manilla liquid.
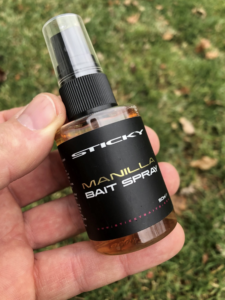
A quick spray of Manilla bait spray is also an option for those anglers wanting a little extra attraction to their bait. Catapulting a few 20mm Manilla freebies into the area will also get them confident when it comes to picking up your hookbait.
A quick spray of Manilla bait spray is also an option for those anglers wanting a little extra attraction to their bait.
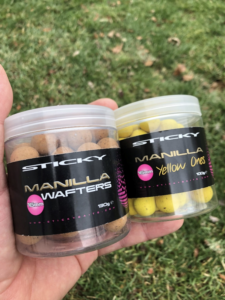
My choice on hookbait depends on the time of year, in colder temperatures I might go with a wafter or bright pop-up on a shorter rig. As the temperatures rise, I might go with a 16 or 20mm bottom bait tipped with some fake corn or when I know the carp are very active, I would go with a snowman approach, a 20mm bottom bait topped with a 16mm Manilla “Yellow one”.
A 20mm bottom bait topped with a 16mm Manilla “Yellow one”.
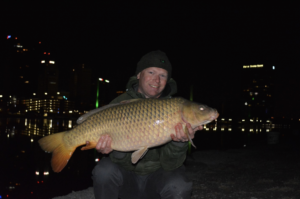
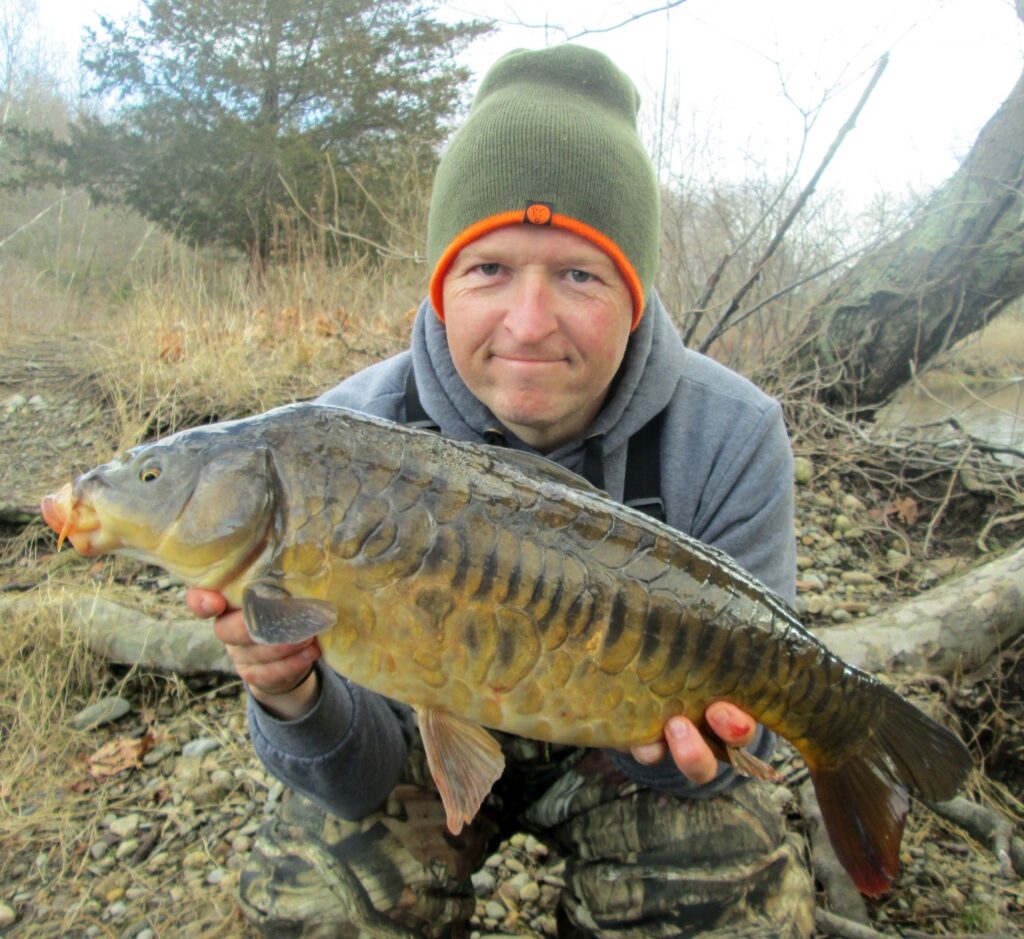
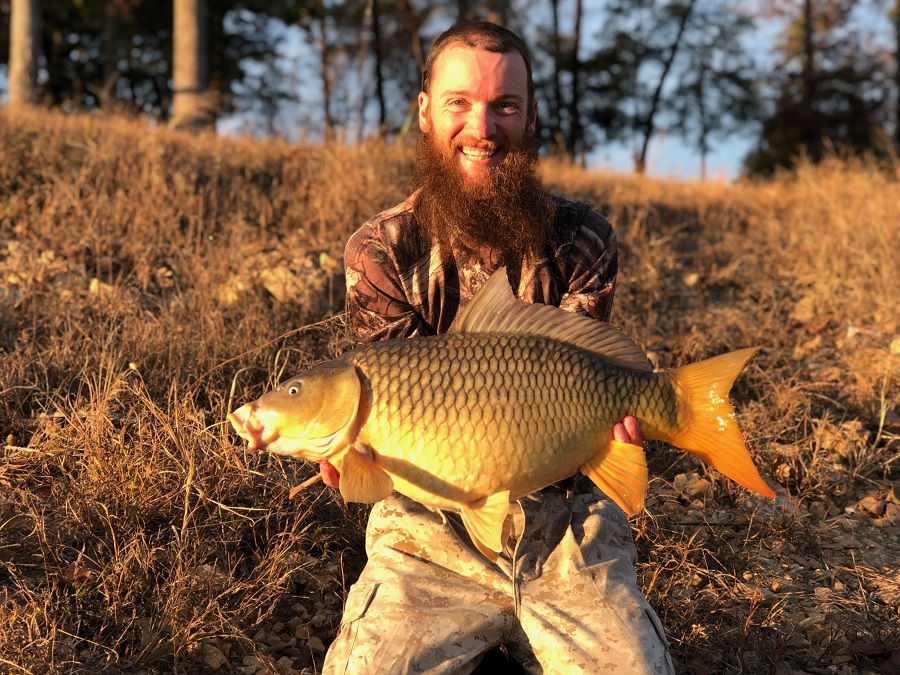
This approach to my fishing has been very successful this past year, putting numerous quality fish on the bank, on new venues that haven’t seen large amounts of boilies in the past. You can tailor this approach to your own angling any way you want, the possibilities are endless.
You can tailor this approach to your own angling any way you want, the possibilities are endless.
I hope it’s given you some food for thought as you plan future sessions. Tight lines and wet nets!!
To check out the full range of Sticky baits I used via the links below from Big Carp Tackle
Before I ever started to target carp specifically I fished for other species both small and large. I’m sure many carp anglers started the same way; float fishing for small fish or throwing a lure around to see what would hit it. My own fishing journey started with canal perch, then progressing onto larger species such as tench, bream, chub and barbel before finally specializing with carp.
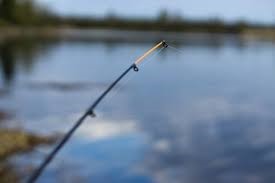
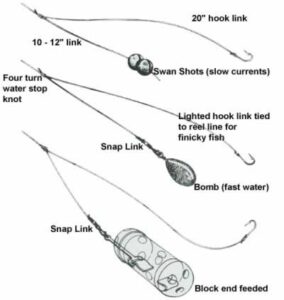
Along the way I fished many different methods with several of these methods suitable for many different species. One method I particularly enjoyed was fishing using a lighter rod where bites were registered on the tip of the rod. Dependent on the rod you are using and the specific end tackle arrangement this can be referred to as the quiver tip (light rod with adjustable soft tips), feeder fishing (using various swim feeders), swing tip (a tip attachment that swings, rather than bends) the bomb (use of a lead) and so on. For this particular article I’ll just refer to the method as feeder fishing, but basically I am referring to the use of a lighter rod set-up where the use of the tip of the rod is the bite indication method.
Why Change Methods?
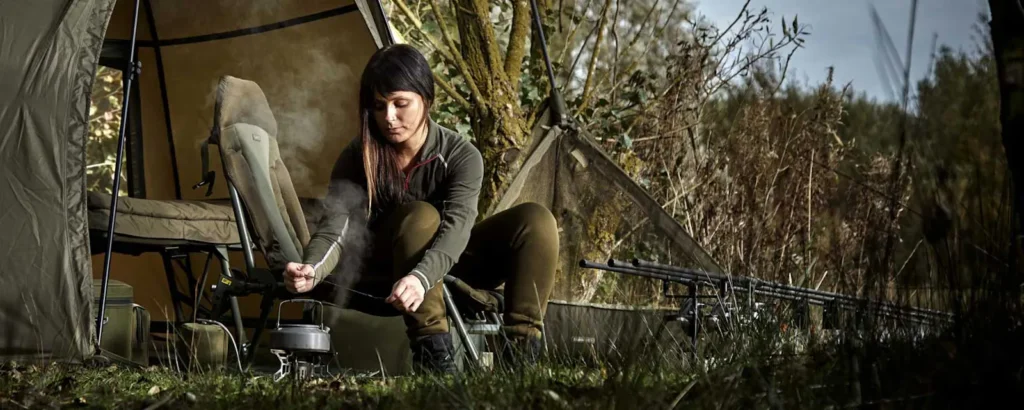
Generally I will adjust the methods I am using to target carp based on several factors including; size of venue, size of carp, depth of water, feeding habits, time of year, weather patterns etc. Most of the year you will find me fishing for large carp and as such my methods are much more Euro-centric. I will be fishing with alarms, rod rests, bolt rigs and baits such as particles and boilies. However, when it comes to my winter fishing I like to be more mobile and also not limited to a static feeding approach. This is where the feeder comes into play.
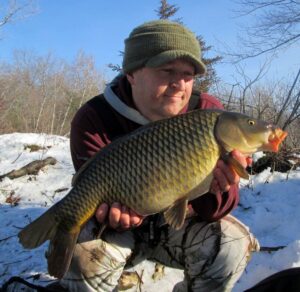
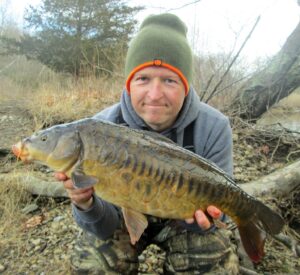
A snow carp, caught using a feeder approach
I decided to switch over the feeder rod tactics three or four winters ago. I was fishing a venue I have caught hundreds of fish from with regular carp tactics but with increased pressure I was seeing that the carp were very, very cute. They absolutely knew they were being fished for and most of the time, bite indication on a standard bolt rig was very finicky. It also coincided with a Christmas gift from one of my friends; a rod that I would usually be used to tame big chub and barbell. This would prove the perfect tool for catching wary winter carp over the next couple of years. I was also targeting carp in the 5-20lb range, but it is also possible to purchase stronger feeder rods that are designed for big carp.
Traveling light and keeping tackle to a minimum
Equipment Used
Rods – My own rod is a 12ft through action (3 piece) Specialist. While it has no test curve stated, it’s approximately 1lb to 1.25lb in test curve. It will comfortably cast a couple of ounces of lead and so far I have landed fish up to 20lb’s in weight, although I have heard of an angler using the same rod in France for carp over 30lb’s!!
There are many ‘feeder’ specific rods you can purchase online, but you could also look for a 9-11 foot rod with a soft tip. Basically, you want the rod to have enough power to land decent sized carp but the tip of the rod needs to be soft enough to register the bite indication without too much resistance.
Quiver tip rod
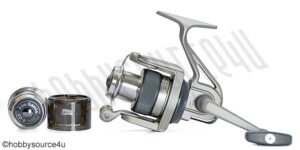
Reels – As the rods are lighter you need to drop the size of the reel so the set-up is balanced. You will be holding the rod more and will be much more active so a heavy reel will definitely be a burden. I use a couple of Abu Garcia CD 1000 reels, which I have had for several years but any small reel which holds about 100 yards of 8-10lb line will be sufficient. One thing to bear in mind is that you also want a reel with a smooth drag as this will help when playing the fish. Spending a little bit more on a quality reel will definitely be appreciated when you are playing a double figure carp.
My preferred reel for feeder fishing
Line – I load my reels with 8-10lb mono, usually Berkley Big Game as it’s very tough and abrasive resistant but any decent mainline will suffice. For the hook-links I use a fluro-carbon line, usually in the 6-8lb bracket, depending on the size of the fish I am catching and also if I am fishing near to snags.
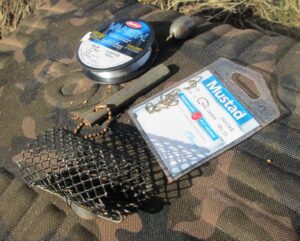
Hooks – As I am using lighter rods, reels and lines the hook sizes are also reduced. As I am fishing for hard fighting carp that can many times be over the 15lb mark I need a hook pattern that is strong and reliable. Most regular carp hooks do not go below a size # 10 so after some research I have settled on a fly fishing pattern, made by Mustad. These hooks are available in size # 10 all the way to # 20 and are very strong.
Some essential rig elements and a home-made cage feeder
Feeders and Leads – Again, you can purchase swim feeders from Europe on many online websites and while these are purpose made, they are fairly pricey. Most of the time I am feeder fishing I am using a ground bait as well and the best feeder to use in this case is an ‘open ended cage swim feeder’. I can make dozens of these for only a few dollars simply by purchasing a sheet of metal gutter guard, some steel cable wire and either lead strips or cheap ½ to 1 oz flat leads. I also use basic non-lead sinkers in the ¼ to 1oz range which are easily picked up at any Walmart or sports store.
End Tackle Arrangements
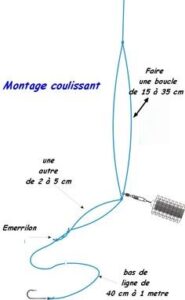
Similar to the different swim feeders available there are also multiple ways you can set-up your end tackle arrangements. I’ll highlight the two set-ups I use the most below.
Loop Rig – Allows the feeder to move up the loop which minimizes the resistance when a fish picks up the bait.
Paternoster Rig – The hook-link is longer than the lead/feeder link to avoid tangles and also to aid indication.
Bait Attachment
With the invention of the modern hair rig back in the early 1980’s carp fishing was revolutionized. No longer were anglers hovering over their rods attempting to hit ‘twitches’ and coupled with the bolt rig, carp fishing and hooking carp in general became a much easier and more consistent process.
For most of my fishing you will find me using modern approaches and as well as the hair rig I’ll also utilize heavy leads and bigger hooks. It’s the complete opposite when I approach my feeder fishing. Yes, I could use a hair rig, but remember, I am not attempting to have the carp bolt when it picks up the bait. In fact, quite the opposite! In theory, as the carp sucks in the bait I will see the indication on the rod tip and thus strike into the carp.
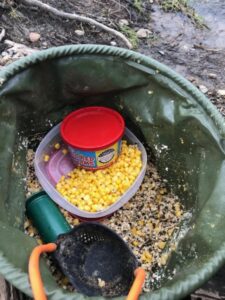
Simple bait choices; with sweetcorn, worms and a decent method mix
With this approach I use smaller hooks, in the size 10-14 range. As importing hooks specifically for feeder fishing is not a consistent approach I have found a few decent patterns of hooks in the fly fishing world. Specifically, I look for a strong wire nymph hook, usually with a curved shank pattern. You’ll be surprised how strong a little hook can be and I have landed many carp up to 20lbs on relatively small hooks.
Attaching the bait is a very easy affair, with one or two grains of sweetcorn nipped onto the hook. I also use other particles directly on the hook, such as chick peas, black eyed beans and maples peas but sweetcorn is truly the king of feeder baits!
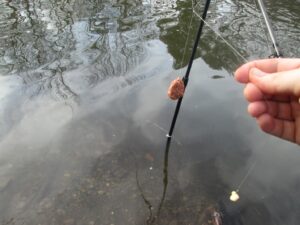
A simple set-up with a paternoster rig and two grains of corn directly on the hook
How to get Started
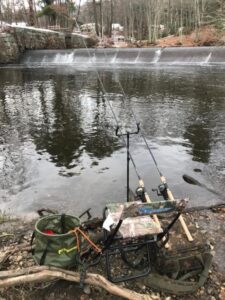
A typical session for me will range from 2-4 hours. I will arrive at the river and depending on the weather and fish activity I will put a little bait out before I start fishing. Usually, this will be 15-20 minutes prior to me setting up which will give the carp time to find the bait and hopefully start to feed.
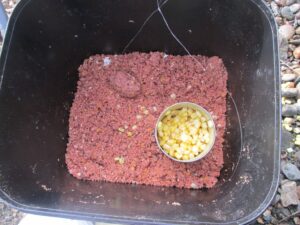
A deer feed based ground bait and sweetcorn for the hook
Once I make my first cast I will be looking not only for solid bite indication but also for any fish activity. In the winter the carp tend to be more localized and as such it may take several casts to locate the fish. Line bites and sharp hits are usually a good indication that the fish are willing to feed.
At this point I will feed with a little and often approach, catapulting in a few grains of sweetcorn and sometime sinking pellets with every cast. If bites are coming regularly then I will keep the same approach, but if they slow down I will either increase the feeding regime or stop it all together! It really depends on how active the fish are and what indication I am receiving.
On days when the fish are not playing ball, then I may shorten or lengthen the hook-link and at times drop to an very light lead, even touch ledgering where I am in direct contact and can ‘feel’ the carp pick up the bait.
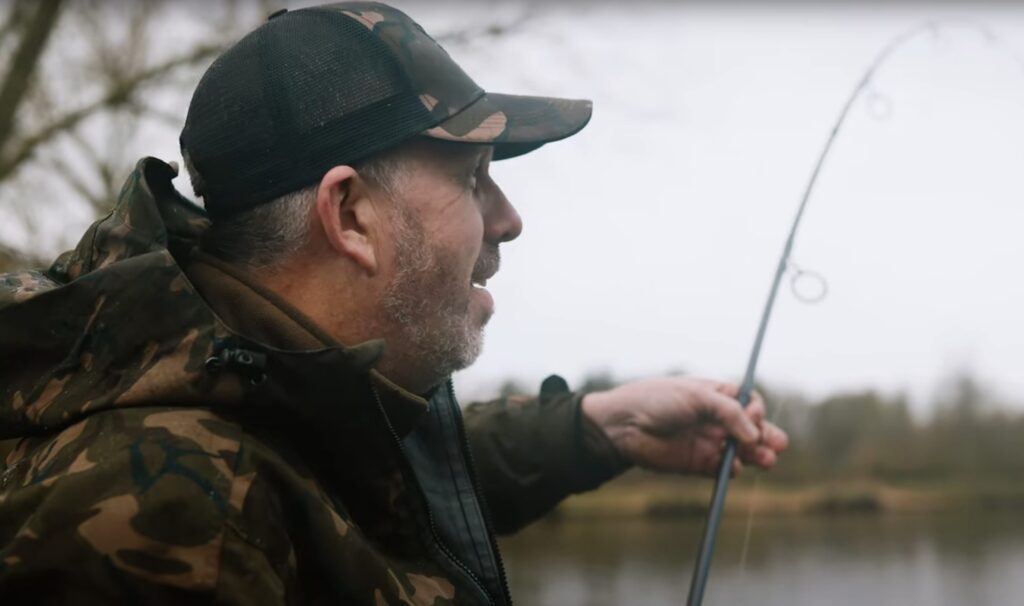
Sitting and waiting for a bite – Patience is the key
The beauty about feeder fishing is that due to the lighter set-up and lead arrangement you can recast regularly with little disturbance to the swim. You are also traveling relatively light so moving swims is also very easy. It’s not unusual for me to fish 3 or 4 different areas in only a few hours of feeder fishing.
However, the main draw for me is that playing the fish on a lighter rod is much, much more fun. It may take you longer to land the fish but I lose very few, even with light line and small hooks as the soft action rod(s) take the lunges and runs with relative ease. You really can’t help but smile as you are playing the fish, it really is that much fun.
Another beautiful mirror caught using feeder tactics and a big smile from the angler
We receive a lot of calls and emails about what gear is needed to start “Euro” carp fishing. There are quite a few terms that can become confusing if you are not familiar with them. The amount of knowledge available on the internet can be overwhelming so I will try to explain the basic carp fishing setup for those interested.
Carp Rods
Carp specific rods range from 9ft– 13ft with the 12ft rods as the “standard” length. They are rated in Test Curve. A test curve is a measurement, in pounds and ounces, of the weight needed to pull a rod tip through a 90-degree angle. The test curve measurement is subjective and different brands 3.0tc rods will perform differently due to the action of the rod. This normally ranges from 2.5tc – 4. 0tc. With advances in carbon and design most 3.0tc rods are considered all-rounders. Moving to a higher test curve will allow you to cast heavier weights more effectively. Lighter test curves will offer more enjoyment in playing the fish at the sacrifice of casting weights and distance. Cheaper rods will have a blend of carbon and fiberglass.
Carp reels fall into two categories; bait runner/free spool and quick drag (QD). Bait Runner/free spool reels have a separate adjustable drag that is activated by a lever or switch. This drag is used after setting the rod down on its holder and allows the fish to take line under light tension. When you turn the handle, it will disengage which switches the reel to it conventional fighting drag. Quick drag reels have one drag system that is controlled by the front drag knob. These reels normally require one or two full turns of the drag knob to go from locked up to “free spool”. Choosing the style of reel is more of a personal preference and one style is not better than the other. The standard size of a carp reel is the 5000 or 6000 series spinning reels.
The choice of mainline is another personal preference. Braid, monofilament, or fluorocarbon line are the normal choices. Each has its own advantages and disadvantages. For example, braid has zero stretch, thin diameter for high strength, and a high price tag. Having no stretch can lead to hook pulls if the drag is not used correctly. Monofilament varies in stretch depending on the brand and their specific design. Most anglers use monofilament as it is the cheapest, most readily available option, and high abrasion resistance. Fluorocarbon offers excellent abrasion resistance, almost disappears underwater, and is supposed to sink faster than the other two. The downside is the price tag and some handling issues when fishing at longer ranges. I recommend using monofilament when starting out for the ease of use and cost. For breaking strains I suggest using the heaviest you can get away with. If you are not fishing long range (100+ yards) Using 18-20lb mono line will give you the greatest chance. If you are fishing around snags/rocks/rivers heavier line will also land you more fish.
This refers to rigs, hooks, swivels, weights (leads), and those type items. There are a huge number of variables, brands, and styles when it comes to choosing which end tackle is your favorite and works for you. I have included a link that covers the basic hair rig and the components you need for them.
One of the best baits to start with is regular sweet corn or other particle baits. Most people have maize available at feed stores for a few dollars for 50lb. You need to prepare the maize to release sugars and make it more attractive to the fish. This is done by soaking and boiling or using a pressure cooker. Here is a link to an article by Iain Sorrell about particle baits
If you have done any research into carp fishing you will have come across boilies. These are basically boiled dough balls. While boilies can be and are very effective they are not something I suggest to people just starting out. The cost and amount normally needed to make them work at their peak is normally not something people just looking to get the rush of catching fish will want to pay. My advice is to find a bait you are confident in and use that until you are ready to expand your knowledge of baits.
As carp angling has progressed the use of bite alarms has become the standard. They offer you the opportunity to do other things while fishing by not having to focus on the rod tip or trying to hear your drag when you get a run. They are great when taking your family or kids fishing as you can do other things while having the rods in the water. There are many different brands, price points, and features. Some of them have a wireless transmitter that sets off the remote/receiver when you have a run which gives you greater flexibility when fishing.
These are used to hold your rods off the ground. A rod pod can be used on any surface such as dirt, gravel, mud, or concrete. They normally hold 2 to 4 rods and have adjustable legs and buzz bars giving you different ways of setting up your rods. Most pods do not include front rod rests or butt rest. The front of your rod will rest on your bite alarm or front rod rest. The butt section of the rod is held by a rear rod rest or butt rest. Bank sticks are another option if you are not fishing on rock hard ground or concrete because you push them into the ground. You can also get away with using 1 bank stick for the alarm and leave the butt section resting on the ground. Bank sticks are made with many different lengths and materials.
One of the most important and underused gear in the all of the fishing world. Landing nets, mats/cradles, and weigh slings are not only used to keep the fish safe while out of the water they also allow the fish to be free of dirt and debris for great trophy photos. These items, while made for carp anglers, can be used for any species of fish big and small. They work great for Catfish, Pike, and Muskie. We have covered the basics of fish care and handling in the following article.
Hopefully you have learned about the entry level gear for starting your journey into “euro” carp fishing. While you don’t have to have 100% of the items I have mentioned most people that become interested in carp fishing collect them over time.
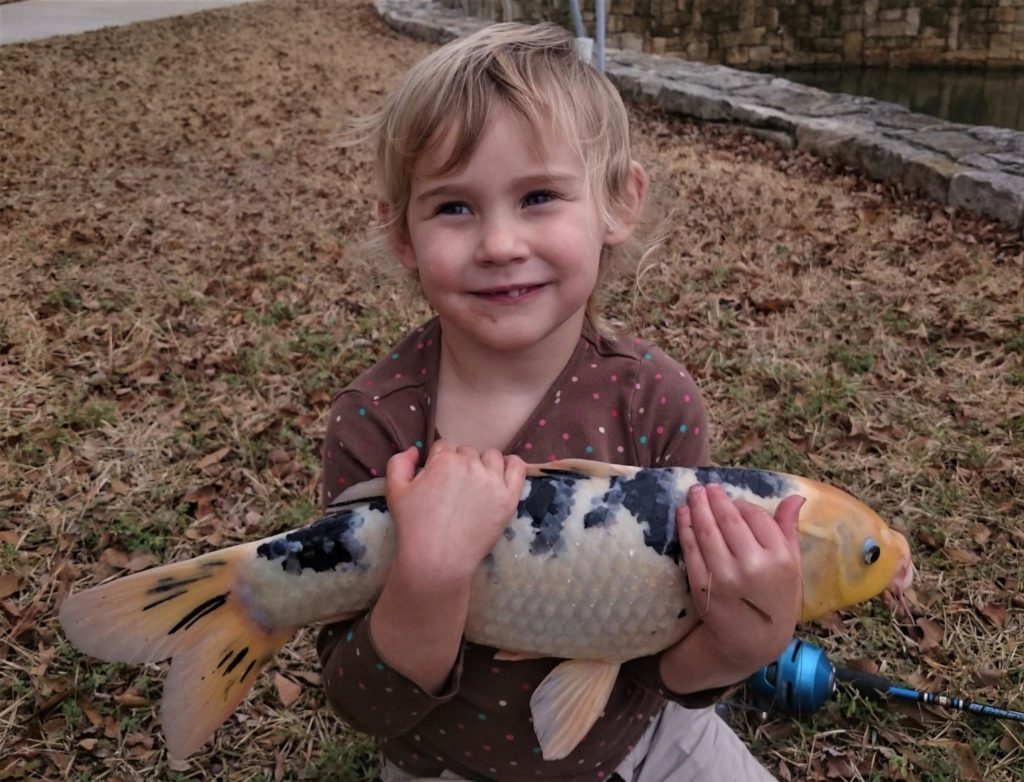
When taking kids fishing, where you decide to fish is the biggest thing that will make it successful – the same applies to catching koi.
Finding the right place to fish is the hardest part of any kid-koi adventure, unlike a “normal” fishing trip, the ability to play in the dirt or ride bikes makes the outing more fun for everyone. I have been lucky to find just such a place in a shopping center of all places. There is a walking trail for riding bikes and another area for playing in the dirt. Other places have even had a playground right near the pond! However, I have found that most larger towns will have a spot and cities maybe a few. City parks are often a good place to look. One of the best ways to find places is to get on Google maps or Earth and see where there is water. Then see if the water has any access. Sometimes it’s not easy to see if you can get to the water or not so drive around to the locations and take a look in person.
After you have found a spot that looks like it fits the criteria, then you have to find out if there are koi in it. If the water is somewhat clear koi are fairly easy to spot so get you polarized glasses on and take a walk around and see if there is anything to see. I bring along a bad or bread just in case I see something interesting, and will also bait a spot and come back in a bit and see if there are any koi feeding – it has paid off!
Rigging for koi can be as simple as you want. For my kids I tend to stick with super simple, like a hook and split shot for most fishing. If a farther cast is needed a slip bobber is good. Koi often are used to feeding near the surface to a slow sinking bait with a bobber can work really well. The pictures below give an idea of the rigging I use on my rod. Scroll over the pictures for captions. Enjoy!
Not every child likes to hold fish, but it’s a great way to capture the happiness of fishing if they will!
It is awesome to see the anglers you are training doing it by themselves!
Some children love pictures…And some children don’t like them at all. He was very happy right before and after and I just have to live with the pics…
Proper netting technique! Also, note the bike helmet since bike riding is a good way to pass the time between koi.
Having good bite indication is important since you will not be fishing the whole time you are fishing.
For most of my koi fishing I have found that a hiviz pop-up is really effective. This Rod Hutchinson Force pop-up in 12mm fits the bill nicely.
Sometimes you will find koi that won’t take bread…but not often. Most koi I have fished for have been all for it.
I am a big fan of liquidized bread – pack it around your hook bait and you are good to go.
While the title “Take notes” may not immediately convey it, this piece delves deeper into the essence of my angling journey, focusing not just on tactics and gear, but on the enduring lessons that have shaped my success over the years. From the inception of the hair rig in the… Read more
If you’re new to carp fishing, the journey can be as simple or complex as you make it, read this short beginners guide to help you get started. Stepping into your local tackle shop for the first time might feel overwhelming with the array of options for bait, tackle, and… Read more
Welcome to Spring Fishing at Manor Farm Fisheries with Fox Consultant, Steve “Spurgenator” Spurgeon! In this captivating journey, Steve shares his expert strategies for catching Carp as the seasons transition from winter rains to summer warmth. Join us as we explore Steve’s unique insights and techniques for adapting to the… Read more
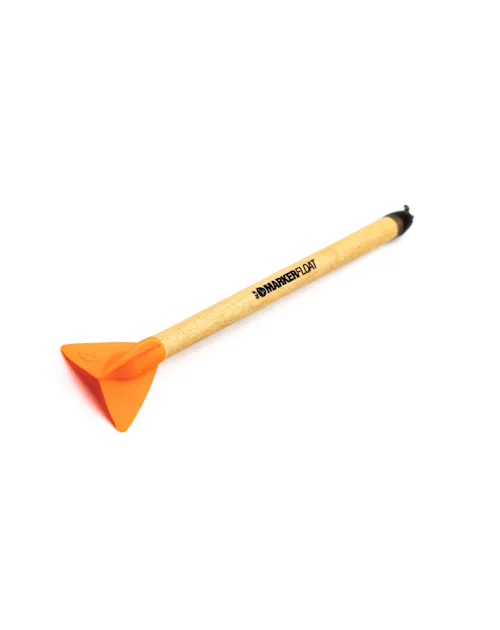
The Marker Float is a crucial tool for understanding your swim. By following some simple steps, you can accurately map out depths, substrates, and distances to fish with precision on specific spots. A Marker Float is a fishing accessory used to map out underwater features such as depths, substrates, and… Read more
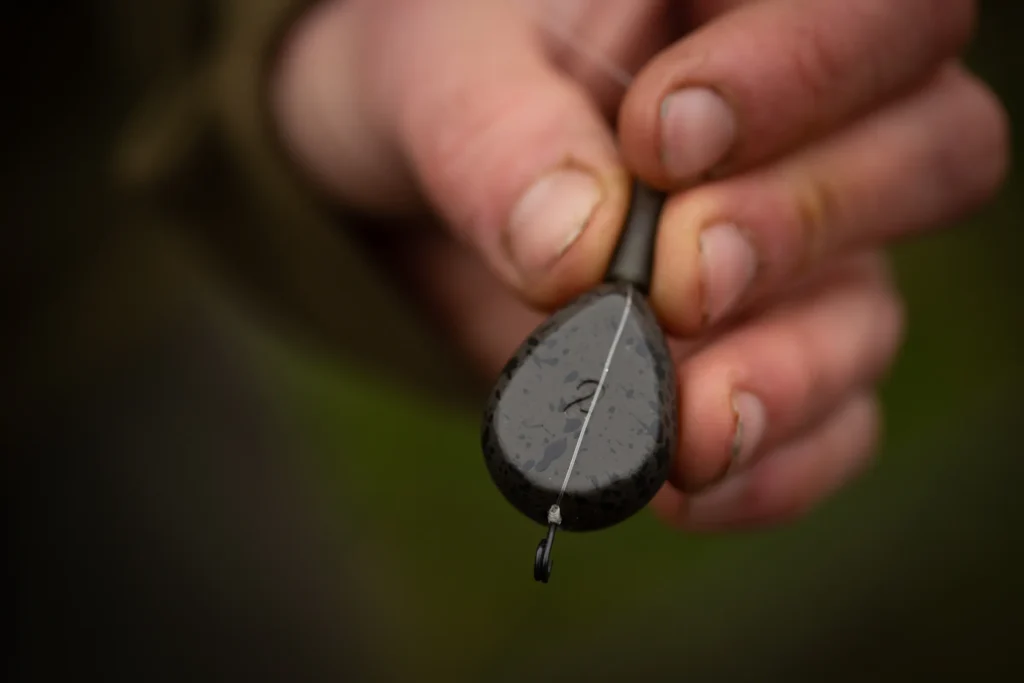
Barry Delderfield talks about why he uses Inline Leads. He excels as one of Korda’s most reliable team members, persistently capturing fish from diverse, challenging waters. Stealth is crucial to his tactics, and his go-to rig consists of small inline leads and extended, rigid hook links. Barry’s preferred Inline Leads… Read more
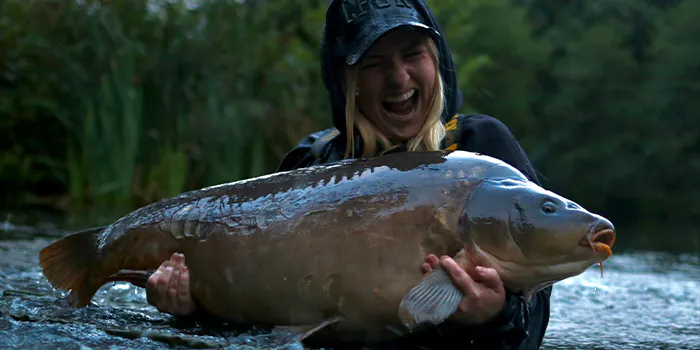
In a thrilling tale of triumph, Hannah Newell (supported by Trakker), shares her exhilarating journey to landing her inaugural UK 40lb ‘er. True to its name, this experience left me utterly astounded. My recent trip to the breathtaking Hacche Moor fishery in Devon was nothing short of remarkable. Accompanied by… Read more
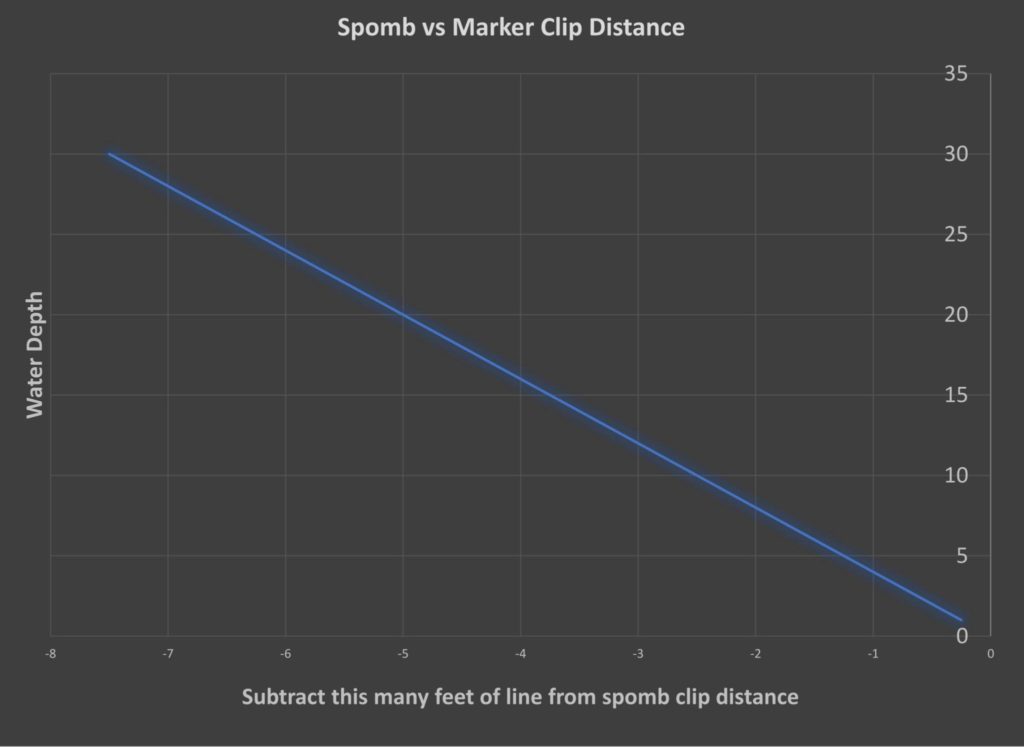
So if you find a great spot with your marker, and get clipped up, how far should you clip for the spod? As it turns out it’s not the same as your marker, but shorter. Take a look at this chart, and say the water is 20 feet deep, follow this line and you will see that you need to take off approximately 5 feet from you casting distance. This is of course not set in stone as many factors such as wind, line type, and other factors can impact this. This chart is based off of 1 foot of line for every 4 feet of water and seems to be a fairly close approximation of what you might expect.
Find the depth on the Y axis and then subtract the number of feet indicated on the X axis from the point where your marker was clipped.
Keep in mind that if it’s windy you will need to give more line as you will get a large bow in you line as you cast. Stay tuned for my next article on accurate baiting and bait placement where I will discuss how I try and maximise my baiting accuracy.
The German Rig is a super simple rig to tie and a super effective rig for fishing bottom baits. The stiff boom of the hook link keeps tangling to a minimum and turns the rig well in the carp’s mouth. So, let’s take a look at making one.
My hook of choice for this (and many other rigs) is the Special Edition Continental Mugga from Gardner. Of course, other Mugga hooks will work, as will other patterns, but I’d stick to patterns that are similar to this one.
The Items you need are simple: Trick Link hooklink or other monofilament hook link like Amnesia, hook of choice as we have already discussed, size 12 rig swivel, and a hook stop.
To start the rig slide the swivel onto the hook followed by the stop. The stop has a small pilot hole in it. This is used to align the point of the hook while threading the stop onto the shank. This is likely the hardest part of making this rig!
After you have the stop on, slide it up over the barb and onto the bend. At this point it should look something like this.
Next cut about 12in of the hooklink and attach it to the hook with a knotless knot or any other snell knot you like.
I like to add a bit of shrink tube to get the angle I like. This is optional and many anglers don’t do this. I personally like the angle with the tube better as it catches on your palm better this way. It’s up to you and I’d recommend trying it both ways and finding out what you like better.
The tube has been shrunk. Again this it optional and is up to personal preference.
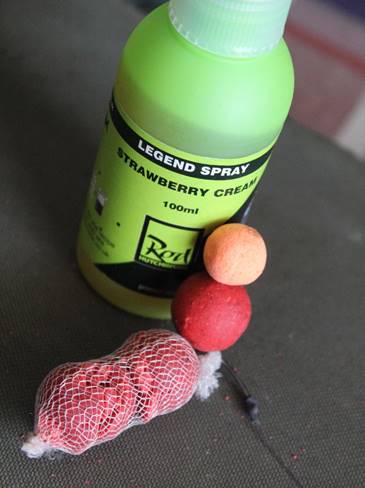
Next attach your bait. You can use any method you prefer but I am going to demo the “heavy mono” method. To do this use 5in of 30lb monofilament line. Put it through the swivel and double it over. Then start pulling the bait onto both ends until its about this far onto the swivel. Note: bottom bait is 20mm Rod Hutchinson Strawberry Cream Boilie .
In this example I am using a snowman arrangement. Notice the tag ends of the mono above the popup – these will be turned into the “hair stop”. I am a fan of the snowman arrangement of baits as I feel it gives the fish a bit more of a target. Note: popup is a 15mm Rod Hutchinson Fruit Frenzy.
Once you have the baits on the hair, simply blob the end with a lighter to keep the bait from sliding off. This method works well with boilies, tiger nuts, and plastic baits. Don’t overlook baits such as tiger nuts on this rig – it’s well suited to them!
After you have “blobbed” the mono with the lighter smash it down flat with your finger and it will form a stop that looks like this. As you can see it’s not very obvious and is also fairly large and really holds the bait on very well.
Since the bait is free to travel the length of the hook, I like to trap it down during the cast so it can’t get stuck on the point of the hook. I do this with a small PVA stick with a longer tag end which I wrap around the hook to lock everything down.
The final rig. If using boilies I like to use a small sick or bag of broken or crushed boilies of the same flavor that I am fishing with. Spraying the whole thing with a top quality attractor is never a bad idea either, but I have found it’s best to not go overboard with the flavor if you are looking for a quick bite.
And here is proof of concept! Not the biggest fish but it’s well hooked which shows the rig to be working well.
There is a ton of information available to the new carper it can be overwhelming and almost off putting. While there are probably hundreds of rigs you will come across they almost all got their start from the basic hair rig and evolved over the years. We receive questions almost daily about what tackle is needed to start using a hair rig. The purpose of this article is to give a basic list of the items needed (at end of article) , a little advice, and setup of the bolt rig.
Let’s start with a photo of a basic hair rig which is tied with the “Knotless Knot”. This creates the Hair in which the bait is placed. There are thousands of “how to” videos on tying the hair rig such as this one from our fellow contributor Brian Wingard.
That is the basic hair rig and over time you will learn to adapt hair length, rig length, material, and the other factors that can make you more confident on using it.
Next we move onto the lead setup. The weight of the lead can be up to you based on how you like to fish as well as the distance you are casting. The basic setup can be achieved in two different styles. The first is called a running rig. This is the same as a Carolina rig that you would use for bass. Instead of the lure you would tie the hair rig onto the free end of the swivel and the inline lead would slide up and down your mainline.
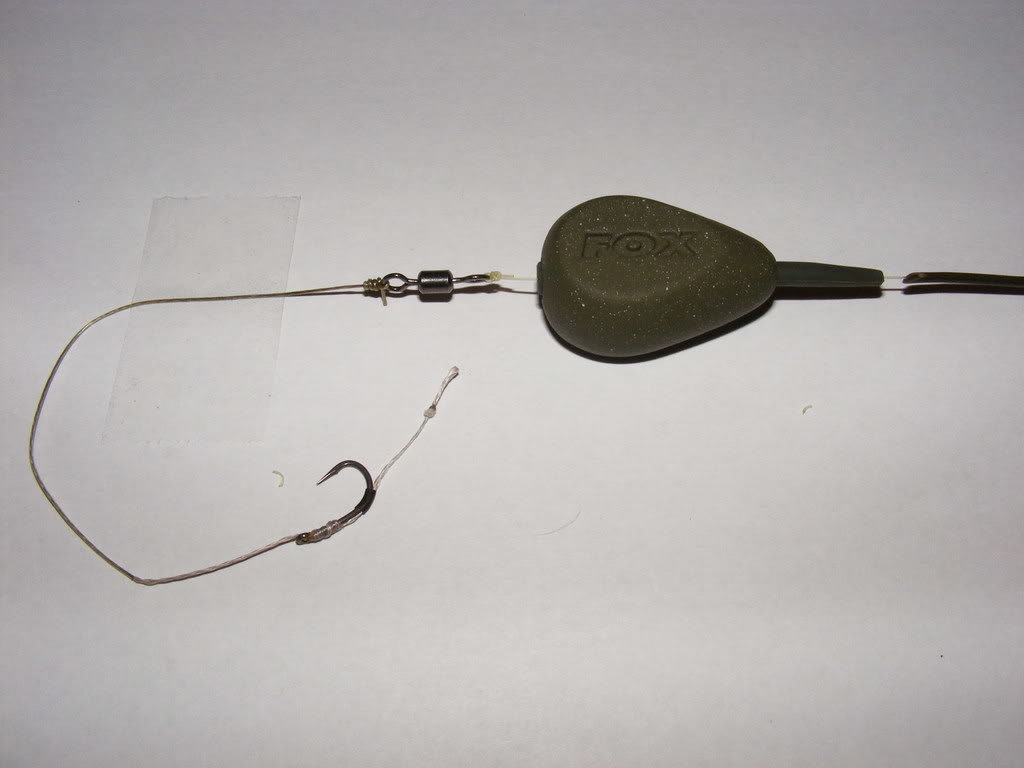
The second setup is called a Bolt Rig. This is done the same way you do the running with with the only difference is the lead is semi fixed so the lead does not easily slide on the line. Using this method with a 2 ounce or heavier weight will accomplish setting the hook when the carp takes the bait resulting in very hard runs. This can be achieved by using leads that have a plastic or rubber insert through them that allows the swivel to be held inside the lead (by friction) until force is applied then the swivel will pop out of the lead.
Example of an Inline lead bolt rig. Before casting out the swivel is pushed into the bottom of the lead.
There are a few other setups such as lead clips and helicopter setups which you can look into however the two methods shown are the basic setups. Make sure when using either rig that fish can take line from the drag of your reel. If the drag is to tight the fish will pull your rod into the water!
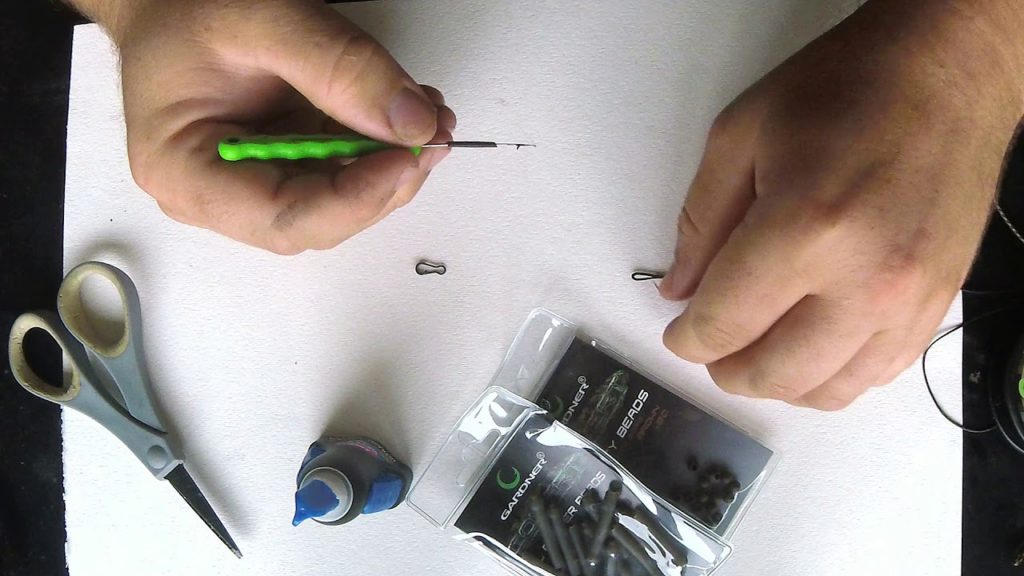
Now to put bait onto the hair rig. This is demonstrated in Brian’s video and I’ve added the following photo to reference. It’s true that you can use a straightened out hook as a baiting needle however a made for purpose baiting needle makes the process a little easier as the hook has a larger barb that can tear the bait apart when sliding against it.
Simply stab your bait onto the needle and then catch the loop of the hair onto the notch and slide your bait onto the hair.
The last item you need is a bait stop. This is placed at the loop in the hair and the bait it pushed against it to hold it onto the hair. This can be a piece of grass or heavy mono. The ones you can buy make it very convenient as you wont have to find something random to use.
Each card has plenty of bait stops.
Now that you have a understanding of the basic hair rig and its setup I’ve added links to where you can purchase these items. I’ve linked to pre-tied hair rigs as well. Buying a few different ones can help you get a grasp of how they work.