Author: Zach Testa

New to Hair Rigs? Info, setup, and the basic tackle you will need.

There is a ton of information available to the new carper it can be overwhelming and almost off putting. While there are probably hundreds of rigs you will come across they almost all got their start from the basic hair rig and evolved over the years. We receive questions almost daily about what tackle is needed to start using a hair rig. The purpose of this article is to give a basic list of the items needed (at end of article) , a little advice, and setup of the bolt rig.

Let’s start with a photo of a basic hair rig which is tied with the “Knotless Knot”. This creates the Hair in which the bait is placed. There are thousands of “how to” videos on tying the hair rig such as this one from our fellow contributor Brian Wingard.0f4fc2bf6cb39487477f7c188bbd86ef

That is the basic hair rig and over time you will learn to adapt hair length, rig length, material, and the other factors that can make you more confident on using it.

Next we move onto the lead setup. The weight of the lead can be up to you based on how you like to fish as well as the distance you are casting.  The basic setup can be achieved in two different styles. The first is called a running rig. This is the same as a Carolina rig that you would use for bass. Instead of the lure you would tie the hair rig onto the free end of the swivel and the inline lead would slide up and down your mainline. carolina-rig

The second setup is called a Bolt Rig. This is done the same way you do the running with with the only difference is the lead is semi fixed so the lead does not easily slide on the line. Using this method with a 2 ounce or heavier weight will accomplish setting the hook when the carp takes the bait resulting in very hard runs.  This can be achieved by using leads that have a plastic or rubber insert through them that allows the swivel to be held inside the lead (by friction) until force is applied then the swivel will pop out of the lead.

2007_09060011
Example of an Inline lead bolt rig. Before casting out the swivel is pushed into the bottom of the lead.

There are a few other setups such as lead clips and helicopter setups which you can look into however the two methods shown are the basic setups. Make sure when using either rig that fish can take line from the drag of your reel. If the drag is to tight the fish will pull your rod into the water!

Now to put bait onto the hair rig. This is demonstrated in Brian’s video and I’ve added the following photo to reference. It’s true that you can use a straightened out hook as a baiting needle however a made for purpose baiting needle makes the process a little easier as the hook has a larger barb that can tear the bait apart when sliding against it.

Simply stab your bait onto the needle and then catch the loop of the hair onto the notch and slide your bait onto the hair.

Baiting needle

The last item you need is a bait stop. This is placed at the loop in the hair and the bait it pushed against it to hold it onto the hair. This can be a piece of grass or heavy mono. The ones you can buy make it very convenient as you wont have to find something random to use.

Each card has plenty of bait stops.


Now that you have a understanding of the basic hair rig  and its setup I’ve added links to where you can purchase these items. I’ve linked to pre-tied hair rigs as well. Buying a few different ones can help you get a grasp of how they work.

BAIT STOPS

PRE-TIED RIGS

BAITING NEEDLES

LEADS / WEIGHTS

All the fish care gear

The Basics of Fish Handling

I wanted to touch on a subject that comes up almost daily, carp care or fish care for that matter.  The fact that we carefully handle carp in America is something that is not seen outside of our community as carp anglers. According to the US Fish and Wildlife services, in 2015 there were 28,463,499 licensed fishermen in the US. The niche that we have as carp specific anglers is only a few percent of that total. An overwhelming majority of the anglers in the US have never heard of or seen a unhooking mat/cradle or fish friendly mesh nets. It’s true that many species of fish could benefit from the carp care gear that we use. I would much rather see a large catfish resting in a cradle than a dirt or gravel bank as I am sure everyone would. I’ll approach the subject in the most basic terms as I can. Carp care also falls into rig safety which Iain has covered in this article. Let’s move onto the first item, Nets.

A fish friendly net is key to not only keeping the protective coating of slime but is the start to taking great looking photos. The slime coat acts as a lubricant while the fish is swimming however it’s more vital role is to protect the fish from any bacteria/virus/infection from attacking the fish. The loss of this slime coat can lead it a whole multitude of injuries and infections which you may not see on the bank however the fish may become ill and die within a few weeks which is the opposite objective of catch and release fishing. The “knotless” mesh nets do not scrape or damage the slime coat unlike the knotted nylon nets that you can readily purchased at any tackle shop. The chances are that if you have a net with the damaging nylon net you can retrofit a fish friendly mesh onto your existing frame and go on fishing. The euro style nets with the large arms can take practice to use and it’s inevitable that it will break if lifted incorrectly which many new users do. Rubberized nets can also be used however I personally prefer the softer, fish friendly mesh. The focus is to get the fish safely into a fish friendly net to move onto the next item,an unhooking mat.

Unhooking mats are something that almost no one outside carp fishing have seen or used. There are folks in the US that think everyone should know and have one when they are first starting. That is a very big demand for them to know of something that they have probably never knew existed. Beginners can become very discouraged when attacked for not having a mat or holding a fish safely however it is something that must be taught and learned as there is no standardize test when you purchase a license that covers fish care. I have personally spent an unknown amount of time politely informing people of better fish care and not just for carp. I’d bet that unless you started carp fishing with someone that had one, there’s a photo or memory (you may not admit it) of you handling a carp with poor technique, I know I have and I’ve been specifically carp angling over 20 years.

I’ve gotten a bit off topic so I’ll come back to the unhooking mats. The unhooking mat is a padded mat that is laid on the ground (see the first photo of the butterfly koi) to protect fish from dirt, gravel, sand, pavement, etc.. from damaging the fish while it flops or removing the slime coat. You will want to put some water on the outside of the mat to aid in the slime coat not getting damaged. If you have a fish friendly net and then lay the fish onto the sidewalk you’ve lost the fish care battle.  A mat can be made from a yoga mat or even a pillow that is put inside a garbage bag for a quick fix. There are plenty of cheap mats available for around $10-$15 that will take care of the basic needs. No need to buy into an expensive mat when you are just getting started.

Another version is the cradle. These are designed to keep the fish elevated off the ground to reduce and damage from flopping around as well as protect the slime coat. Cradles come at a high cost (size and weight also) but when dealing with larger 25+ pound fish they excel and give you peace of mind that the fish isn’t going to slip or jump off the mat and get injured. There has been quite a few soft cradles hit the market that are basically a mat with high walls around the sides to keep the fish retained as an option.Depending on your situation and how you fish one may be better than the other. If you carry all your gear, then a regular unhooking mat is the way to go. If you don’t mind hauling a larger and heavier one, then cradles cannot be beat. I personally would opt of a cradle all the time but times like stalking do not make carrying one very easy so I take a mat.

One of the final pieces are weigh slings. These come in many different forms and prices. Some are no more than a fish friendly sack while others have bars with floats to retain the fish in the water while getting the camera setup. It depends on your situation and how you like to do things on which one will be the best fit for you. They are used to hold the fish safely without damaging the slime coat (there’s a trend here!) and aids in getting the most accurate weight possible. I like to get it wet and let it drain the extra water off. Next I put it on the scale to zero out the weight of it. Then I transfer the fish into the weigh sling as seen above. Then zip up the sides so the fish won’t slip out and you can accurately weigh your catch.


I’ll mention the fish care antiseptics quickly. These are available through several companies and are used to protect and help heal wounds. Not only the area where the hook was but also any damage such as missing scales or injuries that you may see on a fish. They work like Neosporin that you would put on yourself after an injury. While you may see this as slightly extreme when it comes to the life of an old, large fish it may keep them healthy or may save a young one that has an infection from a run in with a boat for example.

Now that we have transferred the fish safely from the net and onto your mat/cradle with its slime coat intact we can get ready for a good-looking photo. It’s always good to have a small bucket or water container on hand to pour some over the fish before you lift it to wash off any leaves, grass, or debris that has gotten onto the fish. This gives the fish a clean shine for the camera as well. I’ve used this photo (credit to Carpology) to show you the best way to hold the carp however it’s the basics for holding any fish safely and in a great photo pose.

Following some basic ideas of fish care you’ll not only have better looking photos to show and remember but you’ll also be keeping the fish healthy for years to come. After all the photos and memories will be seen for years to come so why have the photo of the fish of a lifetime to have dirt and grim ground into the fish and it looking unsightly when you could take a few extra steps and have a beautiful photo.

A few things not to do with carp:

  1. Carp have soft mouths without a jaw structure. Lipping or using a Bogo grip type device will damage the mouth.
  2. Holding a fish vertically, especially large specimen, can damage their organs. Their bodies are not made to counter the effect of gravity and not designed to support their weight outside of water. Holding them vertically pushes all their internals down and can injure them.
  3. Do not hold any fish by the gill plates that you are releasing. This will cause damage to their gills and cause mass bleeding.

A quick note to those that practice good fish care already. There are many ways to approach the topic with someone without coming off as confrontational. I’ve seen it many times over the past 20+ years. When you attack someone that does not know how to handle a fish correctly they shut down and do not want to listen to anyone after that about fish care. They are excited about their catch and want to share it. No need to crush them because they don’t have the knowledge. It’s our jobs as ambassadors to the sport to inform and influence them to change their ways. You’ll find a much better response if you don’t start a fight because they are uninformed (like I would bet you were at one time) about the proper techniques.

Ridgemonkey Modular Hookbait Pots (Video)

https://youtu.be/6WJ0O-FUwMU

  • Ideal for storing all kinds of pop-ups, wafters, bottom baits, imitation plastics and much more! With each section featuring a high-quality seal so all manner of glugs and flavouring can be used without fear of spillage.
  • Bait storage just got organized! No more loose jars rattling around in your rucksack with one of these – designed to screw together with a twist of the hand, the system comes complete with removable internal glug cages and a hard-wearing carry case.
  • 4x  150ml Hookbait Pots
  • 4x Glug Cages
  • Carry Case
  • Approximate dimensions: 220mm x 70mm

Available at Big Carp Tackle
 

What’s in your box Zach? (Video)

https://www.youtube.com/watch?v=Ftq_DXoYUd8

I’ve had a few requests to see what I take on sessions so I made a short video. I said the wrong thing a few times such as the first black box being Ambush when it is NGT. The second was the Solar baiting needle does not include a gated needle. Guess I need to write myself a script! Links are provided in the description of the video to several of the items I personally use.

I have used the Nash Tackle hooks and hook lengths with great success (see my Idaho article). The Rig Station is great as it doubles as a bivvy table with adjustable legs. The JAG hook sharpening kit is vital for super sharp hooks which convert into more hookups.

Creating your own leadcore leaders

There have been several inquiries on creating a how-to on creating leadcore leaders and how to splice different materials. This is something I do quite often as I do like using leadcore when the situation calls for it. Purchasing the leadcore in bulk spools can help save a little bit of money as well as letting you create longer lengths than the pre-tied leaders.

First step is to get the items you need together. For splicing leadcore or other materials you will need a gated needle. Using a regular gated baiting needle can work however using a specific splicing needle makes it quite easier as they are much finer than a regular needle. For this demonstration I used the Solar Micro Splicing needle which come 2 in a pack.

leadcore 1


Next you need to pull back the braided material to expose the leadcore. The amount of lead to cut off will be up to you and after some practice you will find what works the best for you.

Leadcore 2


I will create 2 different connections that I use. The first is attaching a swivel/link clip to one end. You will now take the splicing needle and tread it onto the braided section which is now hollow from removing the lead from the center. Like before this will become easier with practice and you will figure out the best for you situation. Leadcore 3


Next is adding the swivel to the tag end of the braided section. You then latch the tag end with the needle and start to pull the tag end back through the hollow braid with the needle.IMG_2317IMG_2318


It takes a little bit of work to pull the tag end though the rest of the braid. Just continue to work it until the tag end is fully inside the braid. Depending on how long the tag end was you may be able to pull it back through the hole that the needle created where you inserted it.IMG_2319


The final step is to tease the material so that you get a smooth transition from the thicker section to the main part of the braid. This connection will have the swivel directly in contact with the leadcore and there will not be a loop for free movement. This is how I prefer my connections to the swivel.

IMG_2320


The second method I will show you will create a loop in the end. You can still attach a swivel with the loop or create it to have a loop to loop connection with your mainline.

Everything you need will be the same except you will need an item to create the size of loop that you require, most of the time I use a tail rubber. The first few steps are the same. Remove the inner leadcore and thread the needle through the braid.

IMG_2322


As before latch the needle to the tag end. This time you place your item, tail rubber in my case, into the looped section and pull the tag end back through the braided section.IMG_2324


Tease the tag end through the braid once again until you can pull the needle out and finish the splice. Now you have an open loop to use for a loop to loop connection. If you wanted a swivel/clip attached to the loop you would thread it onto the tag end before placing the tail rubber and pulling the tag end though.IMG_2325


I hope this article will help you if you ever need to splice leadcore. It’s something that is very easy and once you do 2 or three of them you’ve pretty much got it figured out.

Tight Lines,

Zach

JAG Hook Sharpening Kit Review by Josef Raguro

Well I’m retiring my Berkley hook sharpener. After seeing Zach retouch his hook points on the bank I decided to get a JAG hook sharpening kit. It comes in a small pouch. The kit includes a vice , jeweler file ,2 polishing stones , jeweler’s eye / magnifying glass and the solution marker for coating the exposed hook.
I like sharpening my hook trokar style for one reason. I don’t want the tip of the hook breaking off in the fishes mouth. By doing this style the hook will actually go through with less resistance. It’s like a hypodermic needle.
How I sharpen the hook. I get my hook of choice which is a size 2 Korda wide gape hook for demonstration. Put on the supplied hook vice. I start out with the jeweler’s file .I tilt the vise up and start doing passes at a 45°angle on both sides of the hook point till I get my desired trokar style shape . Then I finish I up with the two polishing stones. Afterwards I’ll coat it with “the solution ” marker to make it rust proof again. Most manufacturer’s use water proof coating from paint to teflon. Or you can use petroleum jelly or chap stick. Do your self a favor and get one. It can give you a better “edge” on fishing.

jjjjjj

Seek adventure and reap the rewards!

Long and painful hours of planning, anticipation, overthinking melt away when your alarm cries out of the silence for the first time.

Around the end of February, we started to plan an epic adventure. Erick, Joseph, and myself were looking to get away for a week in a remote corner of the country and catch some beautiful, relatively untapped carp of Wild West. We set forth on planning the logistic nightmare to travel over 1300-mile one-way trip. We spent countless hours on Google Maps and Navionics looking for new unfished areas. While we found many great looking areas on the map we had already had a backup plan in mind if they washed out. Fast forward to June.
The day has finally come. Erick and Josef leave early Sunday morning to embark on the drive from Texas to the mecca of carp fishing in the United States. The one, the only BIG CARP TACKLE!!! After some “shopping” as Erick likes to call it as he pockets some Solar Popups and tries to walk out with a 10kg bag of boilies; we spend a bit of time chatting and loading up the truck. I will take full responsibility with the loading issue. The original plan was to rent a small enclosed trailer to take up all the gear in however in the anticipation I forgot to actually reserve it and there was no one available to rent one from on a Sunday. I caught a good bit of flak for forgetting even though we still managed to fit everything and on a side note, Josef is awesome at loading a vehicle! We finally take off around 1:30 pm and begin to embark towards our destination. Hopes are high, energy drinks are flowing, and vaping machines are vaping as we start the 20-hour drive to get to our first destination.

Erick and Josef

Erick and Josef


popup thief

He tried

We had several areas we were looking to scout and hopefully fish. After the 20+ hours and countless Redbulls later (we should have asked them to sponsor the trip!) we came to our first stop. There is a parallel to The Story of Goldilocks and the Three Bears with us selecting a spot and it turns out that we chose correctly. As we traveled around to the North side of the lake on a dirt road we came to a point where we had to stop as it turned into a nature preserve. This was not even a quarter of the way we wanted to travel so we were pretty disappointed. The campground also looked pretty busy so we decided that it was not the spot for us. One of the downsides for the first spot falling through is that our 2nd choice is over 2 hours west of our first. So we decide to scout several river spots along the way. Surprise, none of those spots pan out either as the river has a ripping current and the access is not what it seemed like on Google Maps. After the river is a washout we make our way to the second spot. Just like the rest of the river we could not find adequate bank space and the areas we found did not allow overnight camping. At this time, we have been in the truck for almost 30 hours with very little sleep and plenty of anticipation which is fueled by energy drinks and images of large fish dancing in our heads. We make the tough albeit easy decision to head to the third and final spot which happens to be almost 5 hours back to the East. Needless to say we were not very happy about the drive but we know we will be somewhere with a good chance to bank some beautiful fish. Now after around 40 hours of driving we arrive at our final destination. Just as Goldilocks found out, the third spot was just right. The wait is over.

unpacking

We arrive late afternoon/early evening to a strong, southerly windstorm right into our faces and the chosen swim. Talk about getting a confidence booster! Without a soul in sight we start unloading and choosing our respective swims. We are fishing a gentle point that faces into the south/southwest with a small, slightly deeper cove to our right and a shallow flat to our left. Erick chooses the center swim hoping to allow Josef (on his left) and I (on the right) to pickup any fish coming from our flanks. Our pods are setup about 20 yards from each other as we fan the rods across the point. We haphazardly cast our rods out for the night and finish setting up camp unknowingly needing the rest for it will be a long, eventful week on the bank.

We rise pretty early for having been driving almost 2 days without a break. Bypassing breakfast and getting our baiting sorted out it isn’t long until the first take. Shortly after we wake my rod is the first to go. Now there is a little backstory to this trip. I have been exclusively targeting carp since 1993/1994 and in all these years I have netted and been witness to countless mirror carp however I have not once, in probably tens of thousands of carp, ever caught my own mirror carp. Well that ended at 7:15 am on this particular morning. After a short but very nerve racking fight as it is the first hookup of the trip and I would never live it down if I were to loose the first fish. As she slips into the net we are all relieved and excited that we are into the fish within hours of having lines in the water. Now in good faith for the trip we I release the fish, my new mirror PB around 16lbs, back without an official weight in anticipation of bigger things to come.

My first Mirror Carp. It only took 20 years!

My first Mirror Carp. It only took 20 years!

sucker

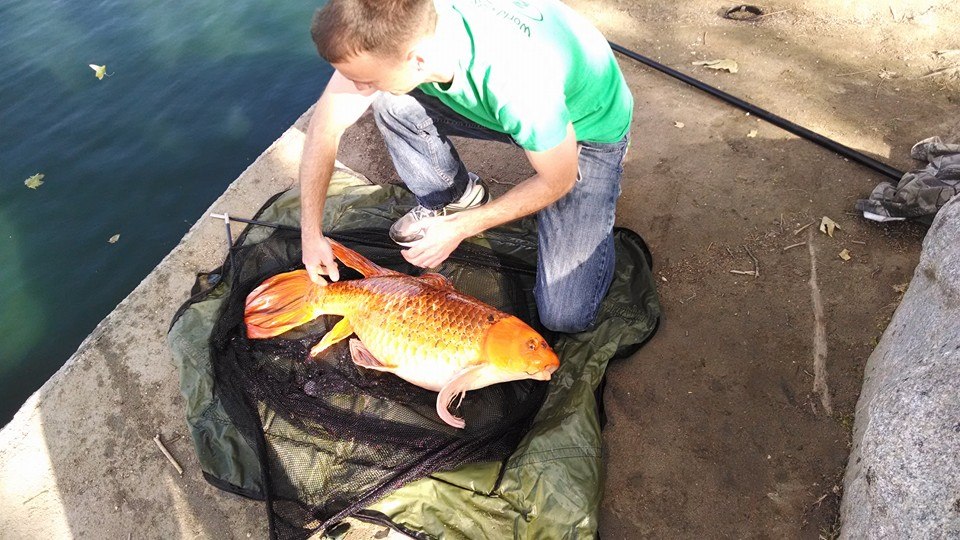
Beautiful native species

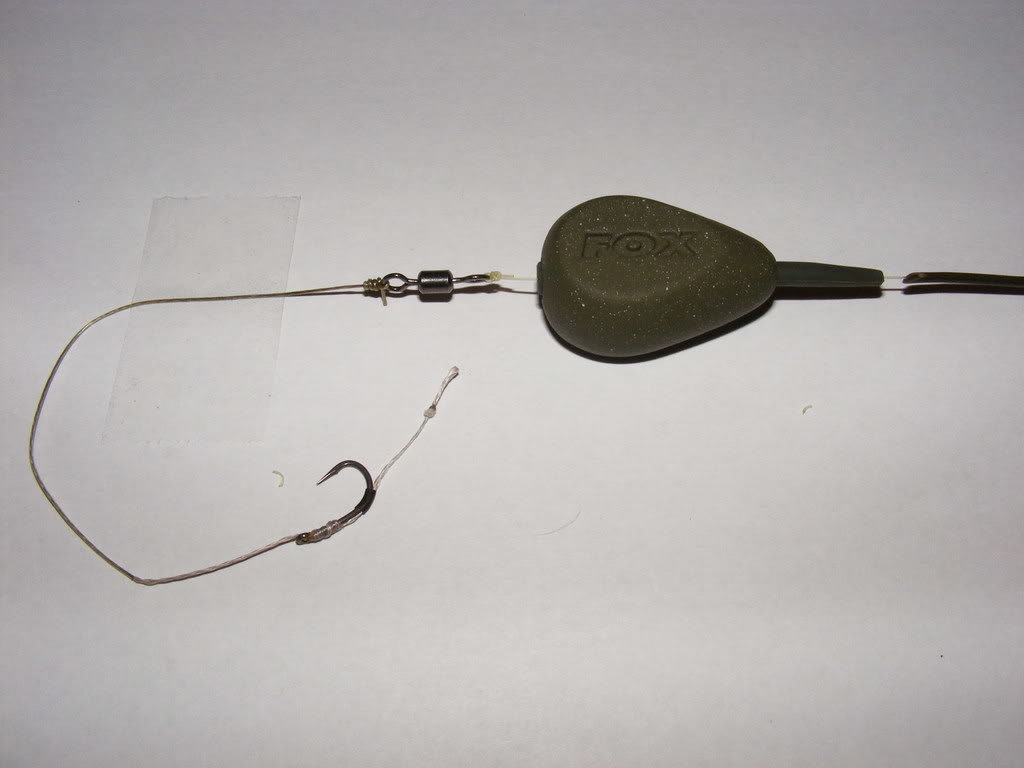
Shortly after my new Pb I receive a second run. This time is is a sucker and another new PB for me. I end up with a second sucker as well before things take a turn.For what seems like the rest of this day and most of the next Erick had the lucky swim. Cranking out fish after fish. Feeling bad for Josef as he has yet to have a run. Josef catches a break while Erick is off “taking care of business” and takes a fish away from Erick on his crazy left handed reels. If you have never tried to play a fish on your off hand with a 12 ft rod you should try it because it’s borderline comedy. Now that we have all had a fish the rest of the trip turns into insanity. We averaged 2-3 fish an hour for almost every daylight hour we had. The night bite was not very effective and while we caught it was actually nice to have a break! After 3 days of almost non stop catches the real magic happens. After catching fish from 3 rod lengths out to around 60 yards out I decided to try a single fluoro hook bait approach. Tying up a 15 inch stiff hinge rig with a 3 in hook length section and a Nash baits 15mm Citruz popup I blast the middle rod to as far as I can. I have not baited out past 60 yards or so and this cast is about double that. It didn’t take long before I have a fish on, another average fish for the trip around 24/25lbs. I bring the rig back to the brolly and touch up the hook point with my Jag file and stones, add a PVA nugget for protection and proceed to blast it out into the same area. Less than an hour goes by before the same rod rips off again. This time the fish feels much heavier. With multiple slow, powerful runs I know I have hooked into a much better fish than the rest. Now I had told Erick early on into the trip that if he sees the fish and it’s big to not say anything as I don’t want to get anxious and do something wrong. Well he messed that up! While waist deep in water turns around and gives me a big smile and a thumbs up! Great now I know that I cannot lose this one. After a brutal battle back and forth along with Erick’s superhero net skills and the largest fish of the trip so far is into the net. This fish made the trip for me, hands down. My new PB of 36 lbs 4 oz and it’s a magnificent mirror! Not only have I caught my first mirror and many in the 24/25lb range this fish left me in amazement! Time stood still as I knelt in the water next to the cradle and gazed upon a beast of carp. Now as an American I’m not quite sure what the carpy English phrase “chuffed to bits” means however it seems to be good and you could say that was how I felt haha. After quite a few photos and a celebratory Coors I took a small break and let everything set in. What more could you ask for a trip that started with 40+ hours in a truck, close to 2000 miles of driving one way?

In Awe

In Awe


pb2

This is what carp angling to me is all about.  36 lb 4 oz new PB


pb release

Wild carp at their best.


pb release 2

Safely released until we meet again.

Well I’m glad you asked! Something even more spectacular happened the next day. We have all seen photos and heard stories of catching braces and triples. Folks I believe we may have one you might have not heard of because we can’t recall it either. Within 30 minutes we had caught a heptad of carp. Don’t worry we looked up the proper term and a heptad is a group or set of seven…. We managed to have 4 fish in the cradle and 3 of the 4 nets we had also had fish in them (safely in the water still). In the interest of fish safety we release 4 of them to get a group photo of 3. Among the 3 that we took in the group photo is also the largest fish which eclipsed my PB and was caught by Erick at 38 lbs. A gorgeous and long fish we took some great photos that he will share with you all.

Part of the heptad of fish. 4 in the cradle! All fish were release unharmed.

A heptad of carp! These 4 in the cradle and another 3 in separate nets at one time. All fish were released unharmed.

3 of the 7 fish we landed in quick succession.


One of many braces

One of many braces that graced our nets.


one day she'll be a 30

One day she’ll grow up and be a 30+


birthmark

Lets call her Marilyn for the “beauty mark” on her scale.


Another Proper Brace

lawman

Josef scored 2 fish while we were visited by Officer Scott of the Idaho Department of Fish & Game. He had no idea that this lake is such a special place for carp anglers that make the journey and stayed around for an hour asking questions and taking photos to show his co-workers. Make sure you get your proper licenses!

capThank you to a random Coors bottle cap for giving us the motto of the trip.

Overall the tripwas a huge success! We captured 90+ carp, only 10 were under 20 lbs with an average of 24/25 lbs. 3 thirties including my new PB. My fish were caught on the multi rig, chod rig, and stiff hinge rig. From distances of 30 feet to over 100 yards. Bait wise almost all of mine were on Nash Citruz 15mm popups, a few on Nash Key 20mm cultured hookbaits and a few on CC Moore 15mm White Pacific Tuna Popups. The fish seem to have a very visual feeding response and the bright baits produce throughout the trip.

End Tackle: Nash, Kryston, Ambush
Rods: Saxon Hexalite 3.0tc and one prototype rod
Reels: Daiwa Basia
Pod: Original Solar Sod Pod
Alarms/Indicators: ATTs crystal body/Solar Titanium short arm indicators

This trip is now my greatest trip to date not only because of the fishing but also because of the camaraderie between good friends and the overall experience which we will not forget any time soon. Since returning back home there hasn’t been a day go by that I don’t flip through the photos and smile and wonder why we even came back at all!

In the immortal words of Sir Izaak Walton, “I have laid aside business, and gone a-fishing.”

See you on the banks! Tight lines!